Polycarbonate Fabrication Guide
Cutting, Forming, Bonding & Finishing Polycarbonate
 Polycarbonate (PC) machines cleanly, forms reliably, and survives abuse; but only if you control heat, moisture, and stress. This guide from Interstate Plastics offers:
- Clear starting points for cutting, drilling, routing, and forming that work on common shop tools.
- Simple setup checklists that help you control heat, moisture, and stress before they cause problems.
- Clear temperature and timing ranges for thermoforming and bending so you know when to heat, form, and cool.
- Quick fixes for the issues you will actually see on the floor (melting, chipping, bubbles, webbing, cracking).
- Practical notes for fastening, bonding, finishing, cleaning, glazing, and brand/coating considerations you should keep in mind.
 Use the quick start tables to set speeds and feeds, then jump straight to the process you are running:
- At a Glance: Polycarbonate Fab Shop Settings & Setups
- Machining & Cutting Polycarbonate
- Thermoforming Polycarbonate
- Bending Polycarbonate
- Fastening & Bonding Polycarbonate
- Finishing, Printing & Painting Polycarbonate
- Cleaning Polycarbonate & Chemical Compatibility
- Polycarbonate Glazing & Expansion Allowance
- Common Polycarbonate Fabrication Problems & Quick Fixes
- Coated Polycarbonate Fabrication Notes (by Surface Type)
- Brand Specific Notes (Lexan®, Makrolon®, & Tuffak® Polycarbonate)
- Safety & Handling
At a Glance: Polycarbonate Fab Shop Settings & Setups
Machining & Cutting Polycarbonate
| Operation | Tools & Geometry | Speed/Feed | Notes |
|---|---|---|---|
| Circular saw | Carbide, triple chip grind; 10–15° rake; minimal table gap | 5,000–6,000 ft/min; up to 6,000–8,000 ft/min | Thin sheet (<1/8") use 8–12 TPI; ≥3/32" use 3–5 TPI. Keep masking on, support well. |
| Band saw | Precision/standard blades for thin; buttress/skip tooth for thick | 2,000/1,500/1,000 ft/min for <1/8", 1/8–1/4", >1/4" respectively | 8–12 TPI (<1/8"); 5–6 TPI (1/8–1/4"); 3–4 TPI (>1/4"). Support to avoid vibration. |
| Router | Straight 2–3 flute, 1/4"–1/2" carbide; 0–10° rake; 5–10° clearance | 20,000–25,000 rpm | Feed against bit rotation; fence for straight cuts; avoid coolants that attack PC. If using cutting fluids, clean immediately with soapy water. |
| Milling/CNC | Sharp HSS or carbide; single flute spiral common | Cutting speed 100–500 m/min; feed 0.1–0.5 mm/rev | Clamp securely; air/water mist for heat; avoid cutting oils. |
| Drilling | Plastic geometry or HSS; 60–90° point; 0–5° negative rake | 1/8": 1750 rpm; 1/4": 1000–1500; 1/2": 350–500 | Oversize holes for thermal expansion; keep ≥2× hole diameter from sheet edge. |
| Shear | Guillotine preferred; 0.001–0.002" clearance | — | Shear up to ~1/4" (6 mm); flame retardant grades shear poorly. Trim sheared edges. |
| Die cut | Steel rule; 3 pt (0.042") rule typical | Maintain ~0.005" punch die clearance | Effective ≤0.080" (2.0 mm). Calculate tonnage from perimeter × thickness. |
| Laser | CO₂ laser | — | Usable; expect amber/brown cut edges; ventilate well. |
Forming & Bending Polycarbonate
| Step | Setting | Guidance |
|---|---|---|
| Predry before thermoforming | 250°F (121°C) in dehumidifying oven. Avoid still air ovens. | Typical drying times at 250 °F are 0.093" — 4 hours, 0.118" — 6 hours, 0.150" — 8 hours, 0.177" — 12 hours, and 0.236" — 24 hours. Times may vary by brand/grade; e.g., for 0.118" Tuffak® lists 4 hours, while Lexan® lists 6 hours. Always confirm the manufacturer's guide for your specific grade. |
| Polycarbonate forming temperature (vacuum/pressure) | 350–360°F (177–182°C) sheet; molds 210–260°F (99–127°C) | Uniform sag = ready to form; maintain ~20 in Hg vacuum; dual side heating recommended ≥0.177". |
| Drape forming | ~300–320°F (149–160°C) | Felt covered male mold; cool under pressure. |
| Hot line bend | 155–165°C at bend zone | Masking may remain during hot line bending; wide parts may curve slightly (a "banana" shape). Cool while clamped in a jig to keep them flat. |
| Cold curving (installed radius) | Uncoated: ≥100× thickness; UV capped: ≥175×; hard coat: ≥300× | Avoid chemical exposure at stressed edges. |
Machining & Cutting Polycarbonate
General polycarbonate machining rules
- Keep the protective masking on during machining to protect sheet surfaces; remove only if it interferes with the operation.
- Use sharp carbide or HSS tools with correct plastic geometry and steady feed to control heat and avoid melting.
- Hold sheets firmly—clamp or support them fully, minimize table gaps, and keep saw/router guides close to reduce vibration and edge chipping.
- Cool with compressed air or a light water mist; avoid petroleum cutting oils or aggressive coolants that can cause stress cracking.
- Clear chips continuously (air blast, vacuum, or peck drilling) and deburr edges after machining for a clean finish.
Circular sawing
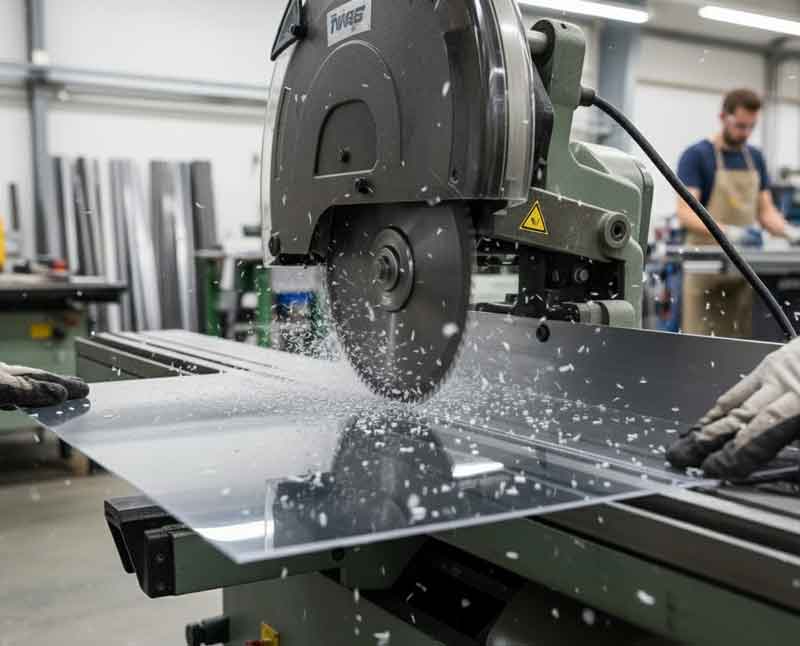
- Use a carbide triple chip blade.
- Minimize the table gap to support the sheet and prevent chip out.
- Troubleshooting: If the cut is melting, increase the tooth size, reduce the speed, increase the feed, and cool with air. If the edge is chipping, use a finer tooth blade, reduce the feed rate, and add more support.
Band sawing
- Choose tooth pitch by thickness: 8–12 TPI for <1/8", 5–6 TPI for 1/8–1/4", and 3–4 TPI for >1/4".
- Set blade speed to 2,000 ft/min for <1/8", 1,500 ft/min for 1/8–1/4", and 1,000 ft/min for >1/4".
- Keep the saw guides close to the work and support the sheet fully to reduce vibration and prevent micro cracks.
Routing & CNC
- Run 20,000–25,000 rpm with 2–3 flute carbide bits for straight cuts.
- Feed against bit rotation for hand routers.
- On rigid CNC with strong workholding, climb passes can improve edge finish; otherwise use conventional.
- Use a fence for straight cuts.
- Avoid coolants that can attack polycarbonate.
Drilling
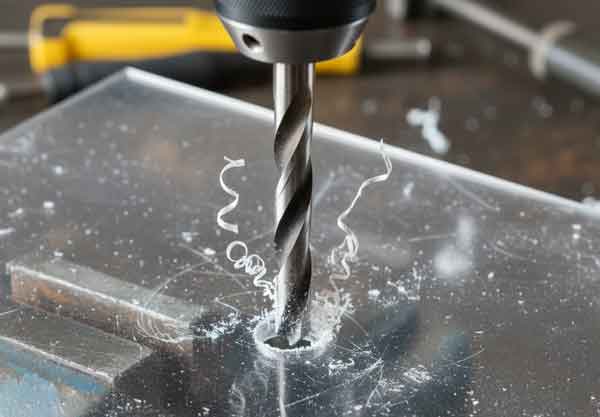
- Use plastic geometry or HSS bits with a 60–90° point and 0–5° negative rake.
- Clear chips frequently and cool with air.
- Drill oversized holes for thermal expansion.
- Keep hole centers at least 2× the hole diameter from the sheet edge.
- Typical drill speeds: 1/8" = 1750 rpm, 1/4" = 1000–1500 rpm, 1/2" = 350–500 rpm.
Shearing & die cutting
- Shear single sheets with 0.001–0.002" clearance. A guillotine shear is preferred.
- Steel rule die cutting works well up to 0.080" (2.0 mm).
- Use about 0.005" punch die clearance.
- Warm parts for cleaner cuts.
- Avoid sharp inside radii.
- Trim sheared edges.
- Flame retardant grades may shear poorly.
Laser cutting
CO₂ laser cutting of PC is possible but often discolors edges (amber/brown) and can add stress; ensure strong ventilation. For thicker gauges or optical edges, prefer sawing or routing.
Thermoforming Polycarbonate
How to Thermoform Polycarbonate
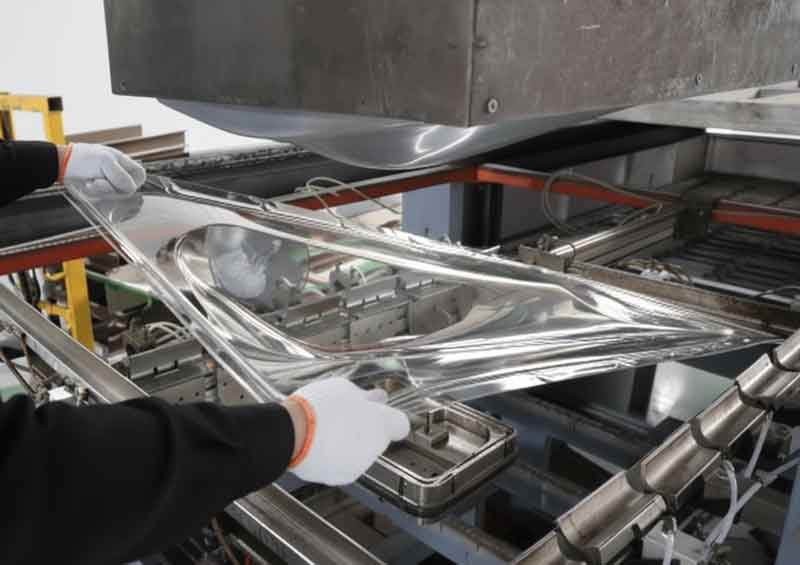
- Predry the sheet in a dehumidifying, air circulating oven at 250°F (121°C) for the time listed in the predry table, then move it directly to the forming station.
- Heat the sheet to 350–360°F (177–182°C) until you see uniform sag. For sheets ≥0.177", use heat on both sides.
- Set the mold to 210–260°F (99–127°C) and maintain about 20 in Hg of vacuum. Use many small vacuum holes and keep the mold temperature consistent.
- Form the part and hold vacuum or pressure through cooling so the shape locks in.
- If you see bubbles, dry longer. If sag is uneven, balance the heaters or use screens. If details are soft, raise the sheet temperature or improve the vacuum seal.
Predrying (critical for bubble free parts)
Polycarbonate absorbs moisture; above ~250°F, it flashes to vapor and creates bubbles. Dry in a dehumidifying, air circulating oven at 250°F (121°C) and move directly to the former.
- Typical dry times at 250°F:
- 0.093" — 4 hours
- 0.118" — 6 hours
- 0.150" — 8 hours
- 0.177" — 12 hours
- .236" — 24 hours
Times may vary by brand/grade; e.g., for 0.118" Tuffak® lists 4 hours, while Lexan® lists 6 hours. Always confirm the manufacturer's guide for your specific grade.
Heating & forming window
- Heat sheet to 350–360°F (177–182°C) until uniform sag; form with ~20 in Hg vacuum. Single sided heat is fine to 0.177"; dual sided above that for penetration and cycle time. Molds: 210–260°F (99–127°C).
- Shading/screens can balance ovens and control sag over wide sheets.
Mold & tooling (mold support) materials
- Mold materials: use wood for prototypes, epoxies or filled resins for molds, and aluminum for production molds.
- Keep the mold temperature constant.
- Post form shrinkage is about 0.6–0.7% at a 120°C mold. Oversize molds to match.
- To reduce witness marks, use many small vacuum holes (0.5–0.75 mm) and recess them on the back side.
- Add 5–7° draft and generous radii/fillets to lower stress and ease release.
Process options for thermoforming polycarbonate
- Vacuum forming pulls a heated sheet against a mold using vacuum. Use this when vacuum alone can create the shape you need. Choose female or male molds, and optionally snap-back or plug-assist, based on where you want wall thickness and surface detail.
- Pressure forming and pyramids/domes use controlled air pressure on the heated sheet while forming. Use this when you are forming domes (typically 170–180°C) or when you need to maintain pressure through cooling to lock the shape.
- Twin-sheet forming creates sealed hollow parts by heating and forming two sheets together. Use this when you need a sealed hollow part. Heat each face independently and control sag with photocells and hot air.
Troubleshooting thermoforming polycarbonate
- Bubbles/blisters: Predry the sheet longer and verify the oven temperature.
- Non uniform sag: Balance the heaters and use screens to even out heating.
- Incomplete detail: Raise the sheet temperature and improve the vacuum seal and airflow.
- Webbing: Lower the heat, increase spacing, and add a mechanical assist such as a plug.
Bending Polycarbonate (Without Full Thermoforming)
How to Bend Polycarbonate
- For crisp bends, use hot line bending at 155–165°C, make the bend immediately, and fixture the part until it cools.
- For small angles at room temperature, use cold line bending. Overbend slightly to hit the final angle after stress relaxes, and limit bends to about 90°. Avoid bending hard coated or UV capped grades at the bend line.
- For gentle curves in installations, use cold curving and respect the minimum radius: ≥100× thickness for uncoated, ≥175× for UV capped, and ≥300× for hard coated sheets.
- For straight bends on thicker stock, use brake bending up to about 0.100" thickness. For ≥ 0.118", add strip heaters on both sides for even heat penetration.
Hot line bending
- Heat only the bend zone to 155–165°C
- Bend immediately, and fixture to cool.
- Masking can remain during this process.
- Wide panels may curve slightly across their width after bending (a "banana" shape). To keep them straight, hold the part flat in a fixture while it cools.
Cold line bending
- Viable at room temp for small angles.
- Stress relaxes over 1–2 days. Overbend to hit the final angle and limit to ~90°.
- Avoid hard coat/UV capped grades at the bend.
Cold curving (installed radius)
Use the following minimum installed radius values for cold curving during installation. The installed radius is the curve radius after the sheet is mounted. Tighter radii increase stress, so follow these limits.
- Uncoated PC: ≥100× thickness
- UV capped (e.g., EXELL D): ≥175×
- Hard coated (e.g., MARGARD FMR): ≥300×
| Thickness | Uncoated | UV capped | Hard coated |
|---|---|---|---|
| 2 mm (0.079") | 200 mm | 350 mm | 600 mm |
| 3 mm (0.118") | 300 mm | 525 mm | 900 mm |
| 4 mm (0.157") | 400 mm | 700 mm | 1,200 mm |
| 6 mm (0.236") | 600 mm | 1,050 mm | 1,800 mm |
Brake bending
Brake bending involves bending the sheet along a straight line at the bend zone, adding heat as needed. It is not recommended to brake bend or thermoform coated polycarbonate, unless it is a special brand/type of formable hard-coating.
- Brake bending up to 0.177" to 90° is feasible.
- For ≥ 0.177" use dual side strip heaters or frequent flipping for even heat.
Annealing
Annealing involves a low temperature heat soak that relieves stresses created by machining or bending before returning to room temperature.
- Fixture the part so it keeps its shape.
- Heat to 250°F (121°C).
- Hold for 15 minutes for every 0.125" of thickness.
- Cool slowly with the blower on.
Fastening & Bonding Polycarbonate
When to use mechanical fastening or adhesives with polycarbonate
- Use mechanical fastening when you want a removable joint and need clearance for thermal expansion (use oversized holes, pan/round heads, and washers/gaskets; rivets with proper spacing are also suitable).
- Use adhesives and solvent cements when you want a bonded joint. Choose solvent bonding for fast, cosmetic joints (note the reduced impact at the joint). Choose adhesives (urethanes/epoxies, silicones, UV cure, foam tapes) when you need durability or flexibility, selected for compatibility, load, and environment.
Mechanical fastening
- Drill oversized holes to allow for thermal expansion. As a design rule, allow ~0.032 in/ft per 70°F (one direction expansion). For glazing across a typical seasonal swing (≈ ±70°F from install), allow roughly 1/16" per foot total (expansion + contraction). A precise estimate is ΔL = 3.75×10⁻⁵ in/in/°F × L × ΔT.
- Use flat underside screw heads (pan/round), avoid countersunk heads (they induce hoop stress). Add large washers and compliant gaskets.
- Rivets: use aluminum/brass/copper with rubber washers; hole size ≈ 1.5× expanded rivet diameter; spacing 5–10× rivet diameter.
Adhesives (structural) & solvent cements
- Solvent bonding (fast, cosmetic). Use methylene chloride (fast) or ethylene dichloride (longer open time). Expect reduced impact at the joint. Keep humidity low to avoid whitening, and allow 24–48 h to cure before load.
- Adhesives (durable). Options include urethanes and epoxies (strong), silicones (flexible), UV cure (fast/high strength), and foam tapes (clean process). Select for compatibility, required stiffness, load, and environment.
- Joint design matters. Prefer lap, double lap, scarf, or tapered lap to shift load into shear. Butt joints are the weakest.
Finishing, Printing & Painting Polycarbonate
Polycarbonate edge finishing
- Start by wet sanding with 400–500 grit. Then, optionally perform a solvent polish with methylene chloride (a small addition of glacial acetic acid can reduce humidity blush). Finish by buffing on a two wheel buffer. Avoid flame polishing polycarbonate.
Screen/digital printing & paint
- Clean with 50:50 water/isopropyl alcohol, remove static with damp chamois or ionized air, use only polycarbonate compatible inks/paints, and avoid aggressive solvents (toluene, xylene, MEK) in mixes.
Hard coated sheets
- Do not print or paint on coated faces. For one-side coated grades, it's generally OK to reverse print on the uncoated side.
Cleaning Polycarbonate & Chemical Compatibility
Safe daily cleaning
Use mild dish soaps (Dawn®, Joy®) and ammonia free glass cleaner (vinegar or isopropyl alcohol only). Wipe with a soft microfiber cloth, then rinse and dry to avoid spots.
Avoid / Use with caution
Avoid or use with caution: ammonia or amine cleaners, strong bases (NaOH, KOH), many ketones and aromatic solvents (acetone, MEK, toluene, xylene), and methylene chloride contact outside controlled bonding. These can cause stress cracking, especially in stressed zones.
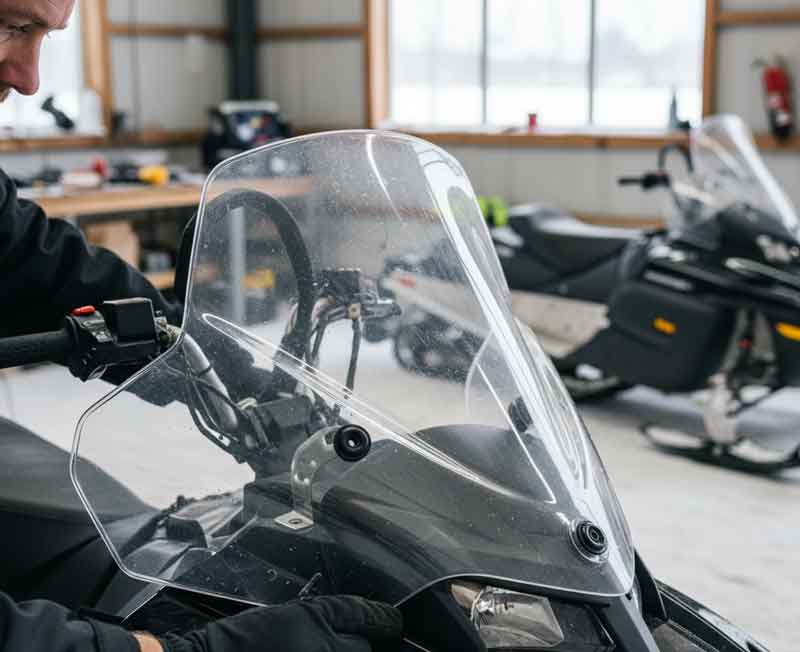
Polycarbonate Glazing & Expansion Allowance (For Installed Panels)
Design frames to allow for thermal expansion. Allow approximately 0.060" per 12" over a 70°F temperature change. Engage edges fully. Use EPDM or neoprene gaskets and compatible sealants. Avoid bolting through the glazing when possible.
Common Polycarbonate Fabrication Problems & Quick Fixes
| Symptom | Likely Cause | Fix |
|---|---|---|
| Bubbles after forming | Sheet moisture | Predry longer; verify 250°F oven temp; move straight to oven/former. |
| Melted/gummed saw edge | Tooth too fine; speed too high; dull blade | Larger tooth, reduce speed, increase feed, cool with air. |
| Chipping at cut | Feed too fast; poor support; blade wobble | Reduce feed; support sheet; check arbor. |
| Webbing in forms | Sheet too hot; draw spacing | Reduce heat; add plug assist or change mold spacing. |
| Cracks near fasteners | Countersunk heads; holes too tight | Use pan/round heads; oversize holes; add washers/gaskets. |
Coated Polycarbonate Fabrication Notes (by Surface Type)
- UV capped (e.g., EXELL D / SL): cold curve ≥175×; print/paint only on uncoated side as directed.
- Hard coated (e.g., MARGARD / AR): avoid cold bends; do not print/paint on coated face; excellent abrasion/chemical resistance.
- Uncoated GP: best machinability and cold curving margin (≥100× thickness); solvent bonding possible.
Brand Specific Notes (Lexan®, Makrolon®, & Tuffak® Polycarbonate)
Is cutting and forming polycarbonate sheets different by brand?
In almost all cases, major polycarbonate brands process the same. Differences tend to be small and relate to recommended ranges (e.g., saw surface speed) or to specialty coatings/FR grades (which affect shearing and cold curving limits). When in doubt, follow your specific PC brand's datasheet.Tuffak® polycarbonate
- Cutting: Use a conservative saw surface speed (5,000–6,000 ft/min). Keep masking on and support the sheet well.
- Forming & bending: Follow the same predry, thermoforming, and bending settings listed in Sections 2–3.
- Notes: Flame retardant grades may shear poorly; trim sheared edges.
Lexan® sheet bending and Lexan® heat forming
- Lexan® sheet bending: Use hot line bending at 155–165°C and fixture until cool. Small angle cold line bending is possible; overbend slightly and limit to about 90°.
- Lexan® heat forming: Predry at 250°F (121°C), heat to 350–360°F (177–182°C) until uniform sag, and form with ~20 in Hg vacuum with molds at 210–260°F (99–127°C).
- Notes: Do not print or paint on the coated face of coated sheets; for cold curving, use at least 175× thickness for UV capped sheets and 300× for hard coated sheets.
Makrolon® polycarbonate
- Cutting: Upper saw surface speed range can be higher (6,000–8,000 ft/min). Use a carbide triple chip blade and minimize table gap.
- Forming & bending: Use the same drying, forming, and bending settings seen in the Forming & Bending Polycarbonate table, Thermoforming Polycarbonate section, and Bending Polycarbonate section; apply dual side heating for sheets ≥0.177".
Safety & Handling
- Wear eye and hearing protection; use guards and chip collection.
- Ventilate laser and solvent work; follow SDS and OSHA exposure limits.
- This guide summarizes practices sourced from our manufacturers and provides general, typical figures. Always consult the official manufacturer documentation for the specific grade and brand of polycarbonate you are using, and follow those instructions if they differ.
This guide was authored by Christopher Isar and reviewed for technical accuracy by Chris Clark.

About the Author
At Interstate Advanced Materials, Christopher Isar turns "it depends" into "do this." Since 2011, he's helped buyers choose plastics with confidence by focusing on what works on the shop floor and in the field, backed by IAPD Level 2 certification. If your project can't miss, Chris will guide you to cost-effective, real-world options. Contact Chris.